A pipeline example with Populse_MIA’s
This page gives a concrete example on how to create pipelines and how to iterate them correctly in Populse_MIA.
The data
Let’s assume that the current project contains data from 7 patients as below (small animal imaging data that can be retrieved directly from the populse_mia package):
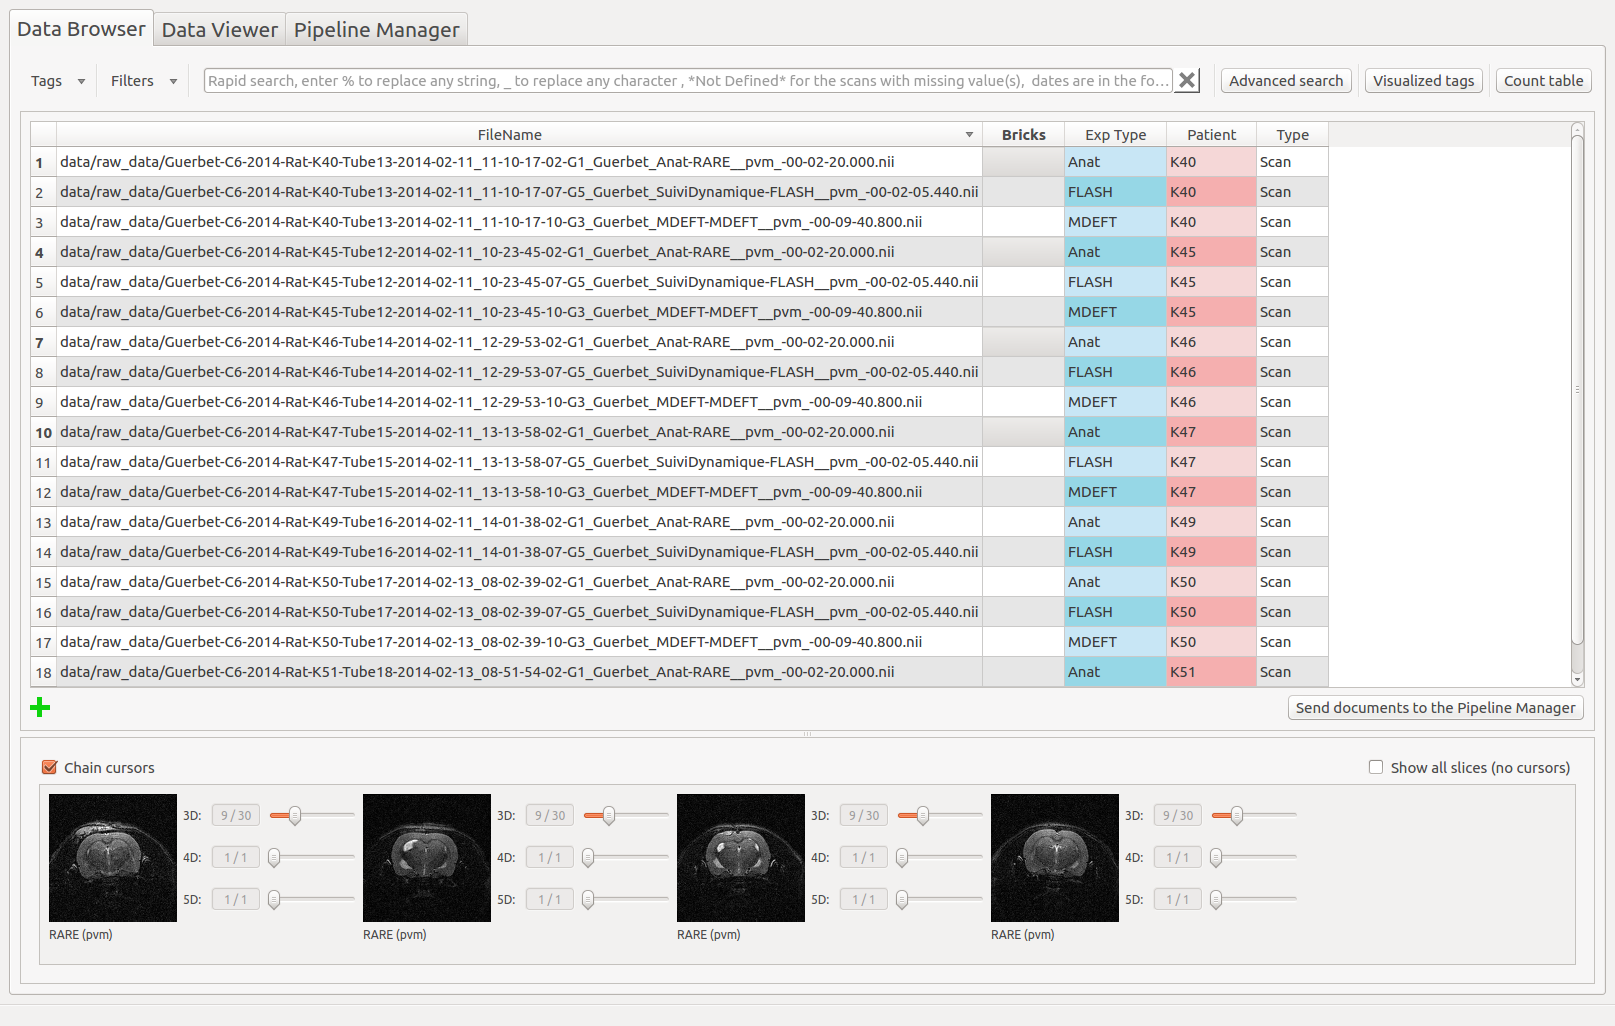
Note: thanks to the Count Table, we know that they are some missing files for patients K49 and K51. For the other patients, three “Exp Type” are available : Anat, FLASH and MDEFT.
Requirements specification of the pipeline
The pipeline that will be created:
Will use SPM processes from the mia_processes library (the nipype library is provided as is in mia and we cannot certify that all processes/bricks from nipype works correctly)
Will be iterated on some patients in the project
Will perform the realignment of the FLASH scan
Will perform coregistration of the realigned FLASH scan with the Anat scan
Will perform smooth the MDEFT scan
Pipeline creation
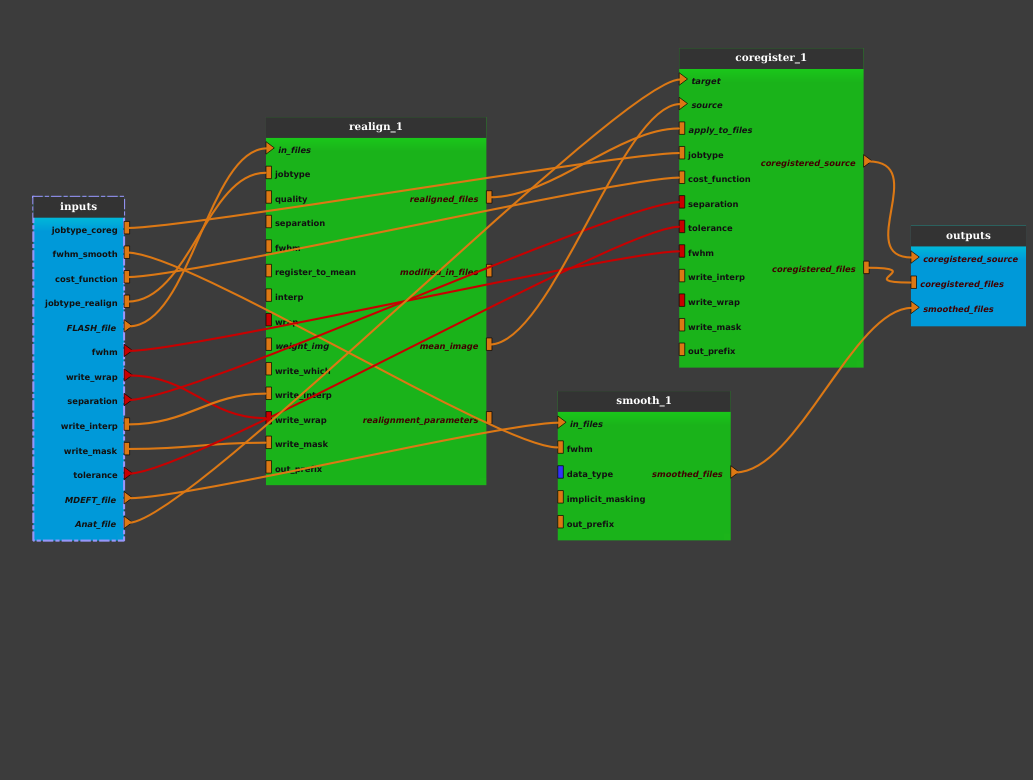
First add the three SPM processes from mia_processes by dragging them from the process library (under mia_processes > bricks > preprocess > spm) and dropping them into the pipeline editor:
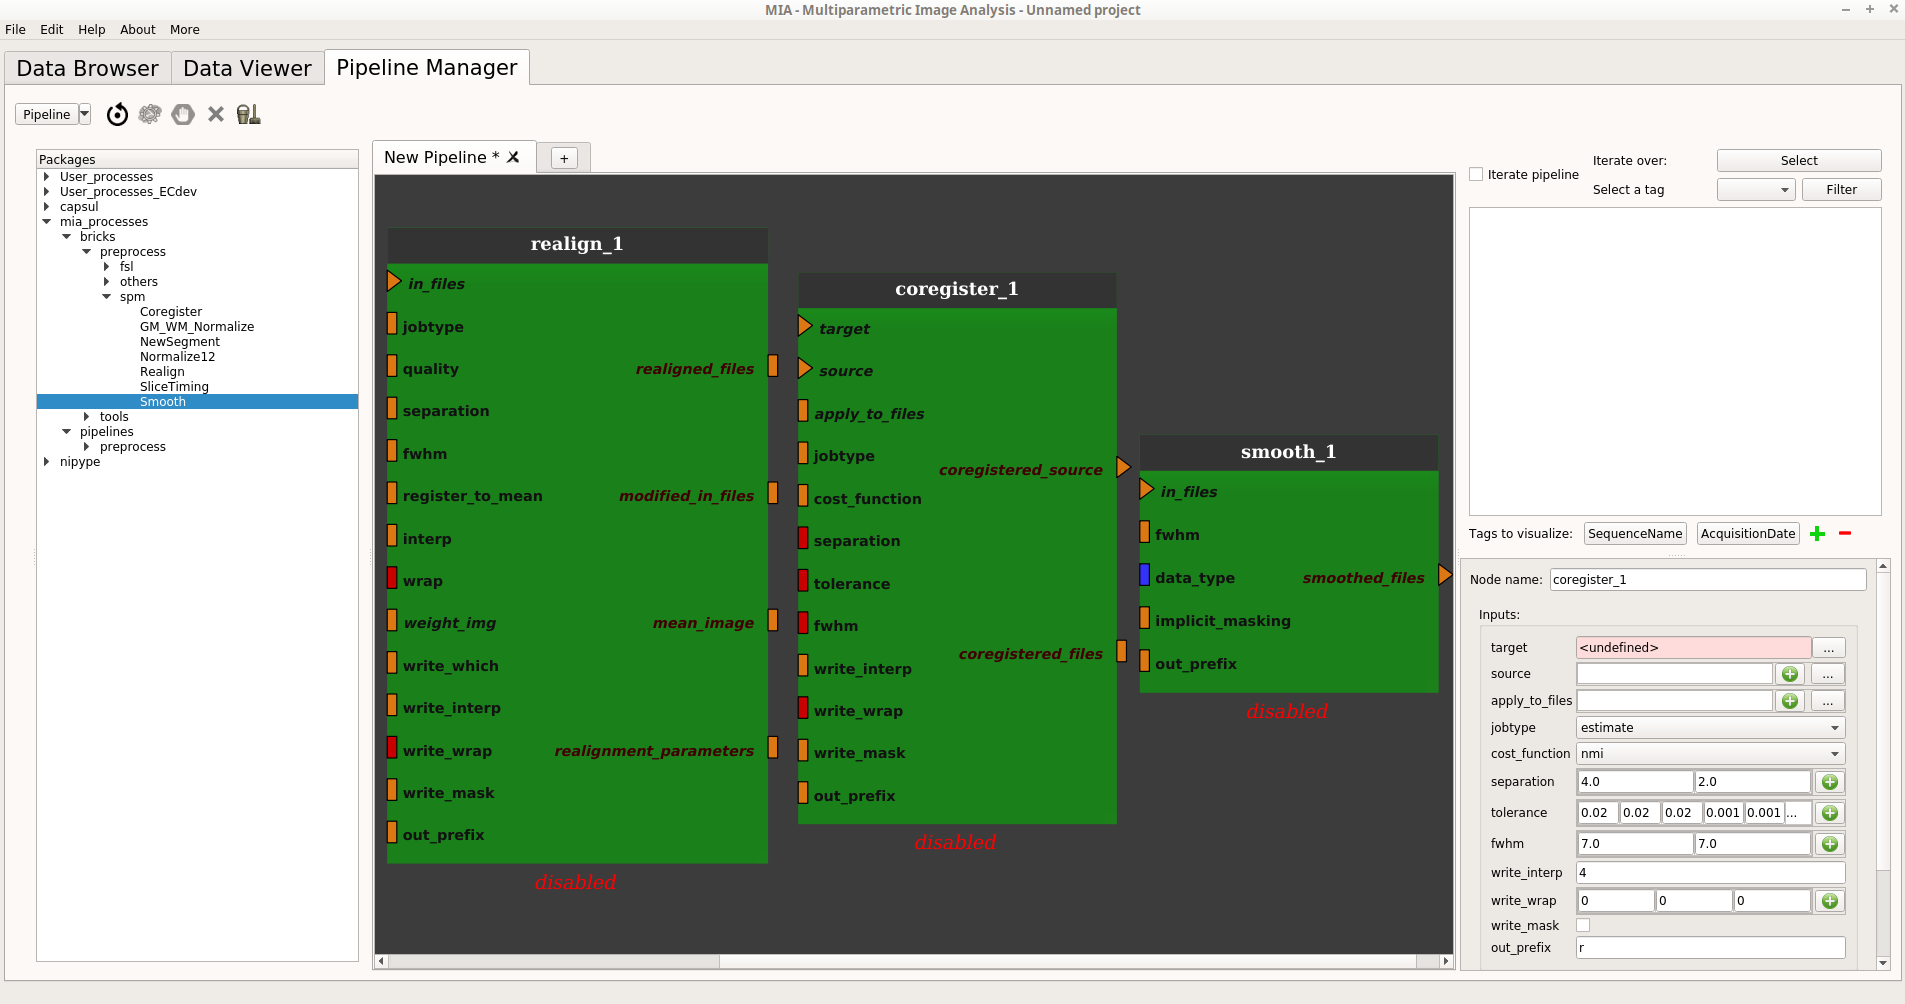
Export the plugs that we want to be able to modify from outside the pipeline and add links between the realign and coregister nodes (more information):
The Realign process jobtype will be “write” so the output of the node will be a new file that will be contained in the “realigned_files” plug.
We will also choose to create the mean image of the FLASH scan. It will be contained in the ‘mean_image’ file.
The “target” of the Coregister process is the reference file to register to. In this case, this is the 3D Anat file.
The “source” of the Coregister process is the file to register to the target. In this case, this will be the FLASH scan’s mean image.
The transformation from “source” to “target” will be applied to “apply_to_files” which is, in this case, the realigned FLASH scan.
Save the pipeline in the proposed folder (User_processes) by clicking on “Save pipeline” or “Save pipeline as” in the “Pipeline” menu:
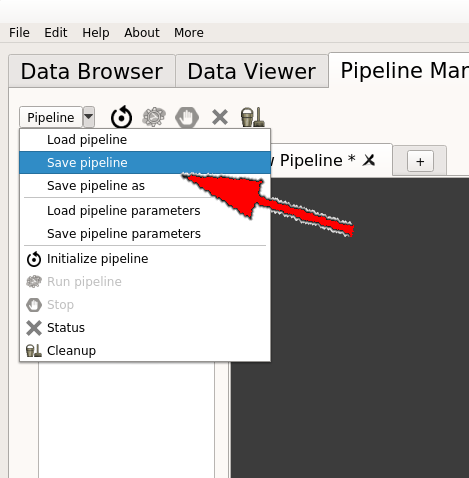
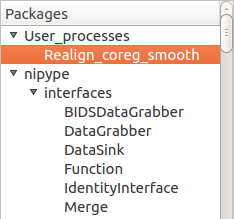
The pipeline is now stored in the process library under “User_processes”.
Pipeline iteration
There are several ways to iterate a pipeline (or a process). See Pipeline iteration for details. Here we are using and detailing the via Input_Filter brick/process, with use of the iteration table method.
To be able to iterate the pipeline correctly, we will need a filter process/brick that is ready to use in the mia_processes package, since the 1.1.1 release (the Input_filter brick/process). The mia_processes package is available from the Cheese Shop.
Add the previously saved pipeline in a new editor by dragging it from the process library (under User_processes) and dropping it to the pipeline editor.
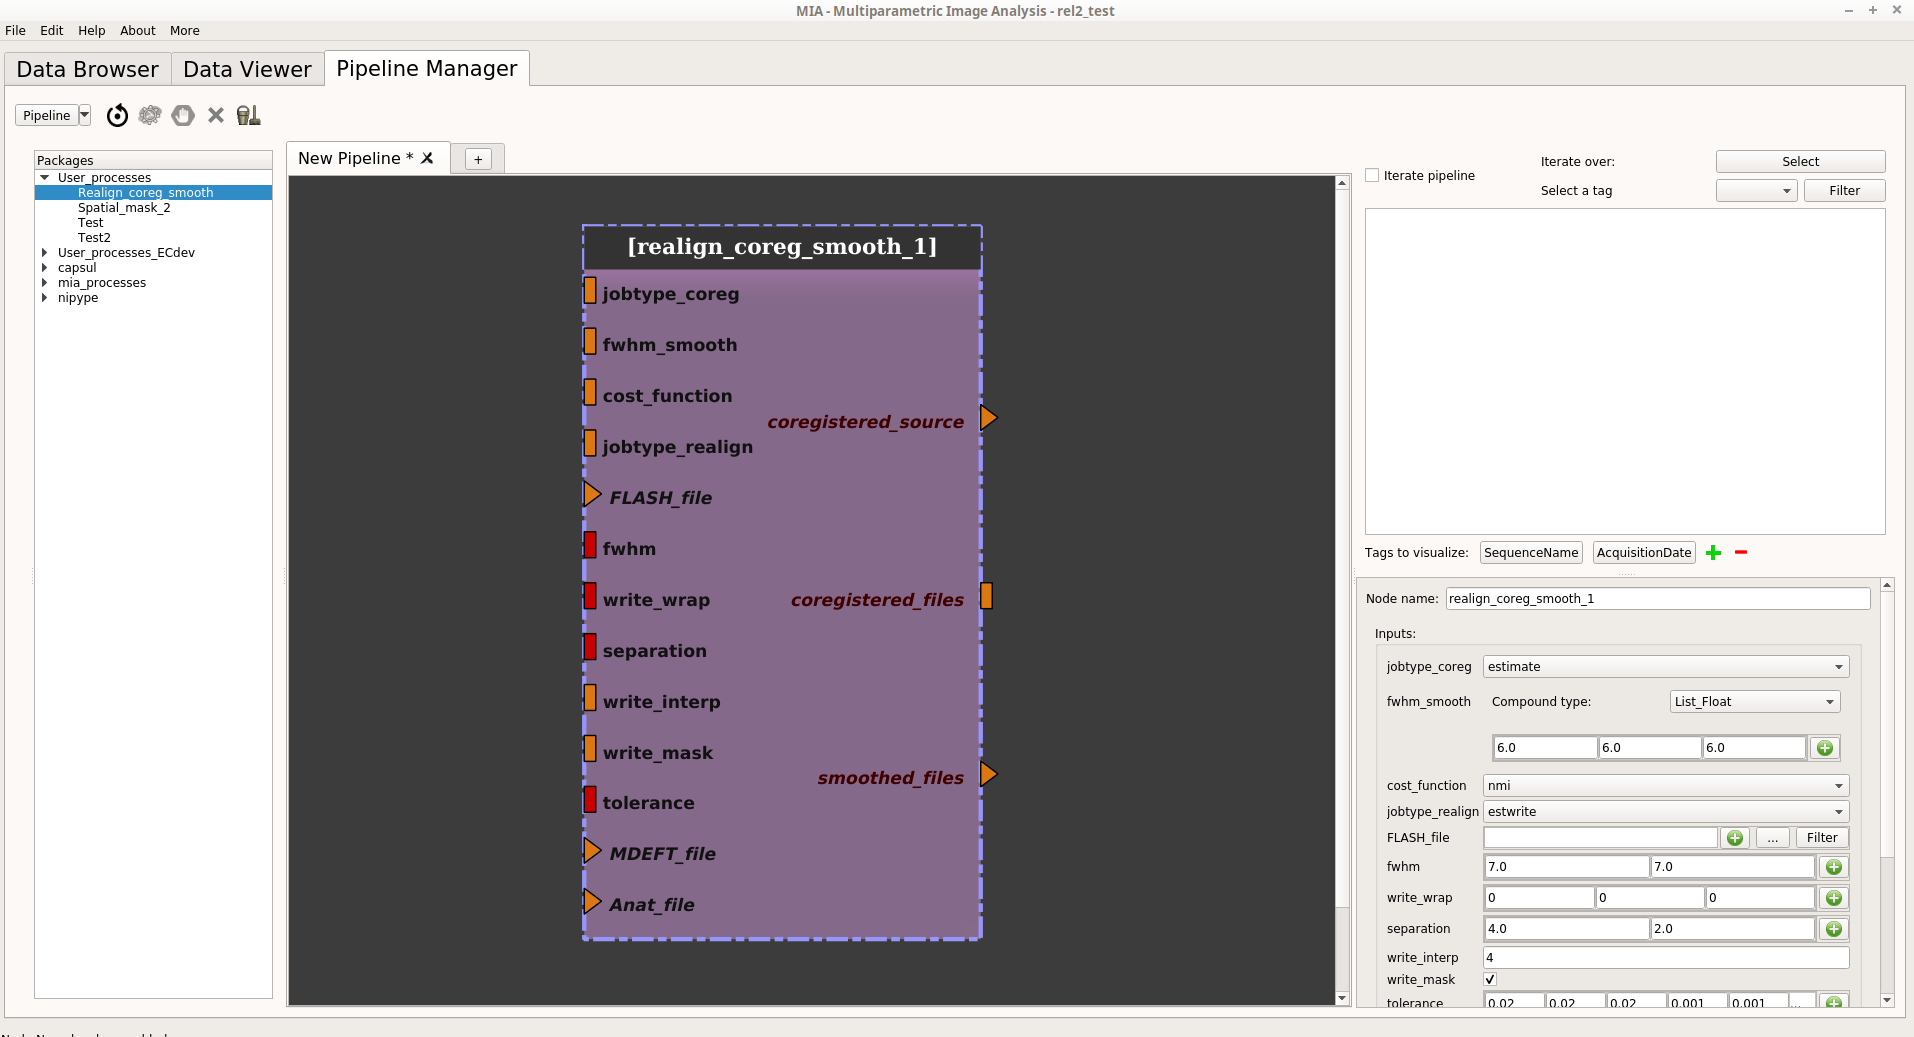
Check on the iterate pipeline button:

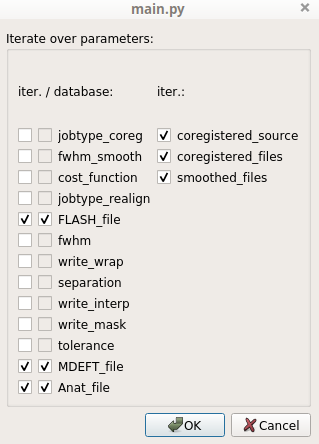
A dialog pops up and displays all the pipeline parameters. We wish to iterate the pipeline only on the input images (all computational parameters will be identical throughout the iteration). In this case we only check the parameters corresponding to the input images:
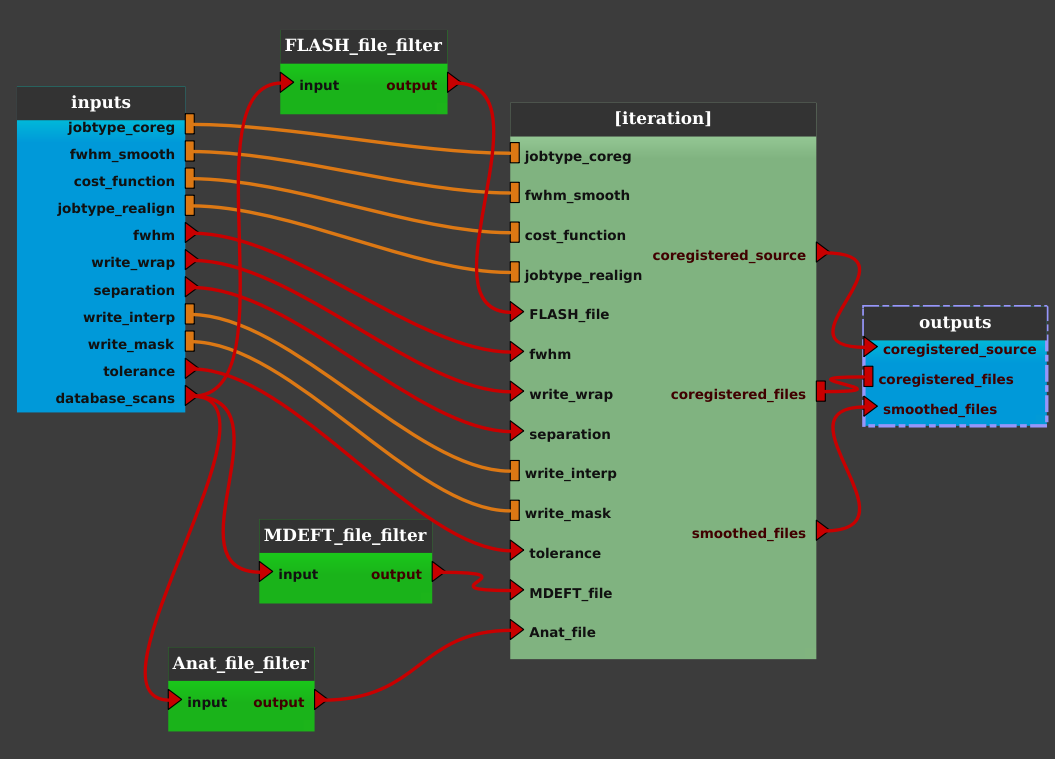
Click on the OK button. The pipeline is now changed into an iterative pipeline, with an iterative node, and 3 Input_Filters nodes (FLASH_file_filter, MDEFT_file_filter and Anat_file_filter). The former pipeline is now inside the iterative node:
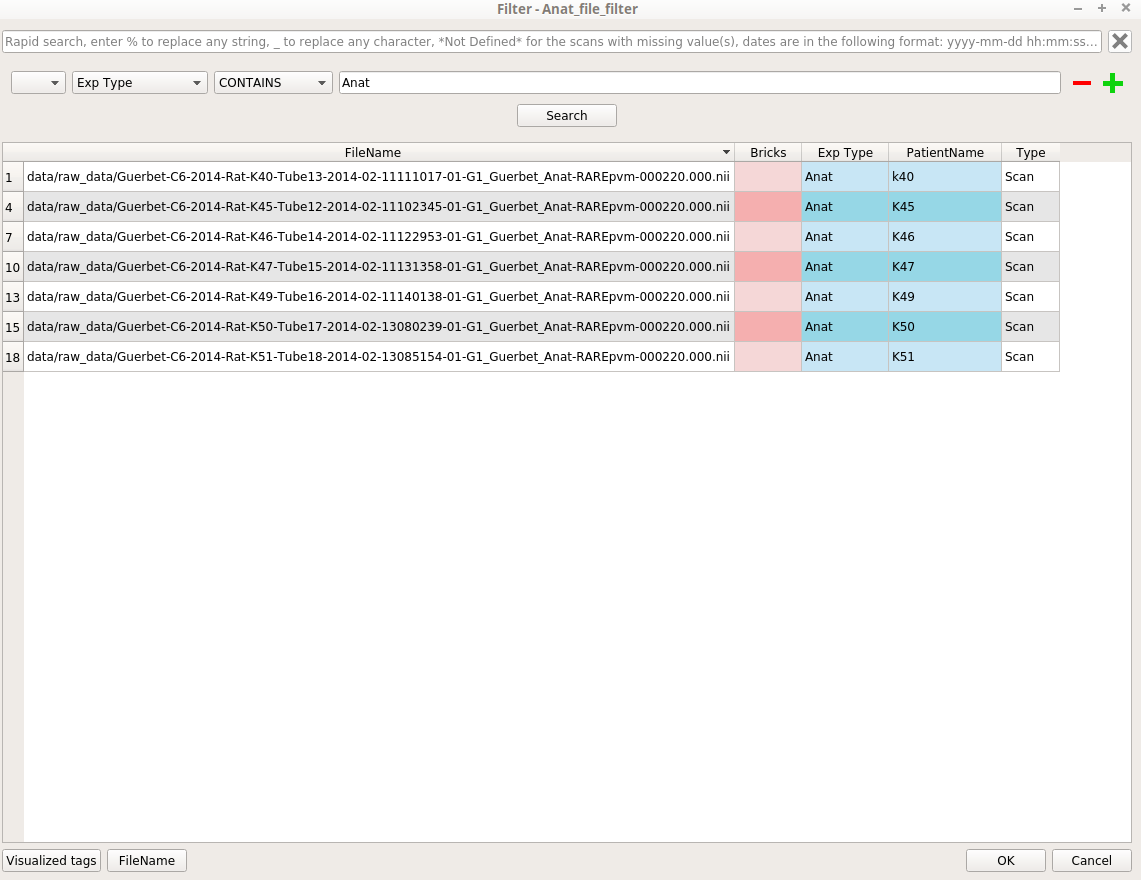
- For each Input_filter process, right click on it and select “Open filter”. In the filter pop-up window, change the filter to be applied to select the desired image type.
For example, for the Anat_file_filter node; Set: “Exp Type == Anat” (or “Exp Type CONTAINS Anat”) in the Advanced Search field; Click the Search button. If the result is the one we want, click on the OK button:
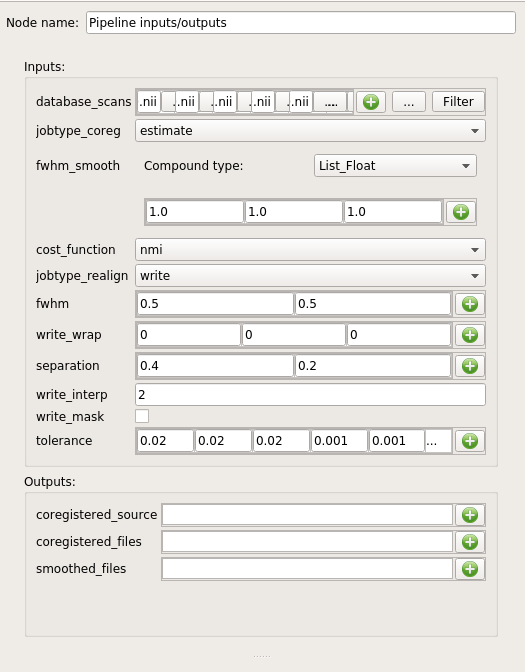
Click on the “inputs” or “outputs” node and modify the parameters in the node controller:
- Save the set of parameters that we have just modified by clicking on “Save pipeline parameters” in the “Pipeline” menu.
This step is not mandatory. But by saving these parameters, the next time we open the pipeline, we will be able load them directly by clicking on “Load pipeline parameters” in the “Pipeline” menu.
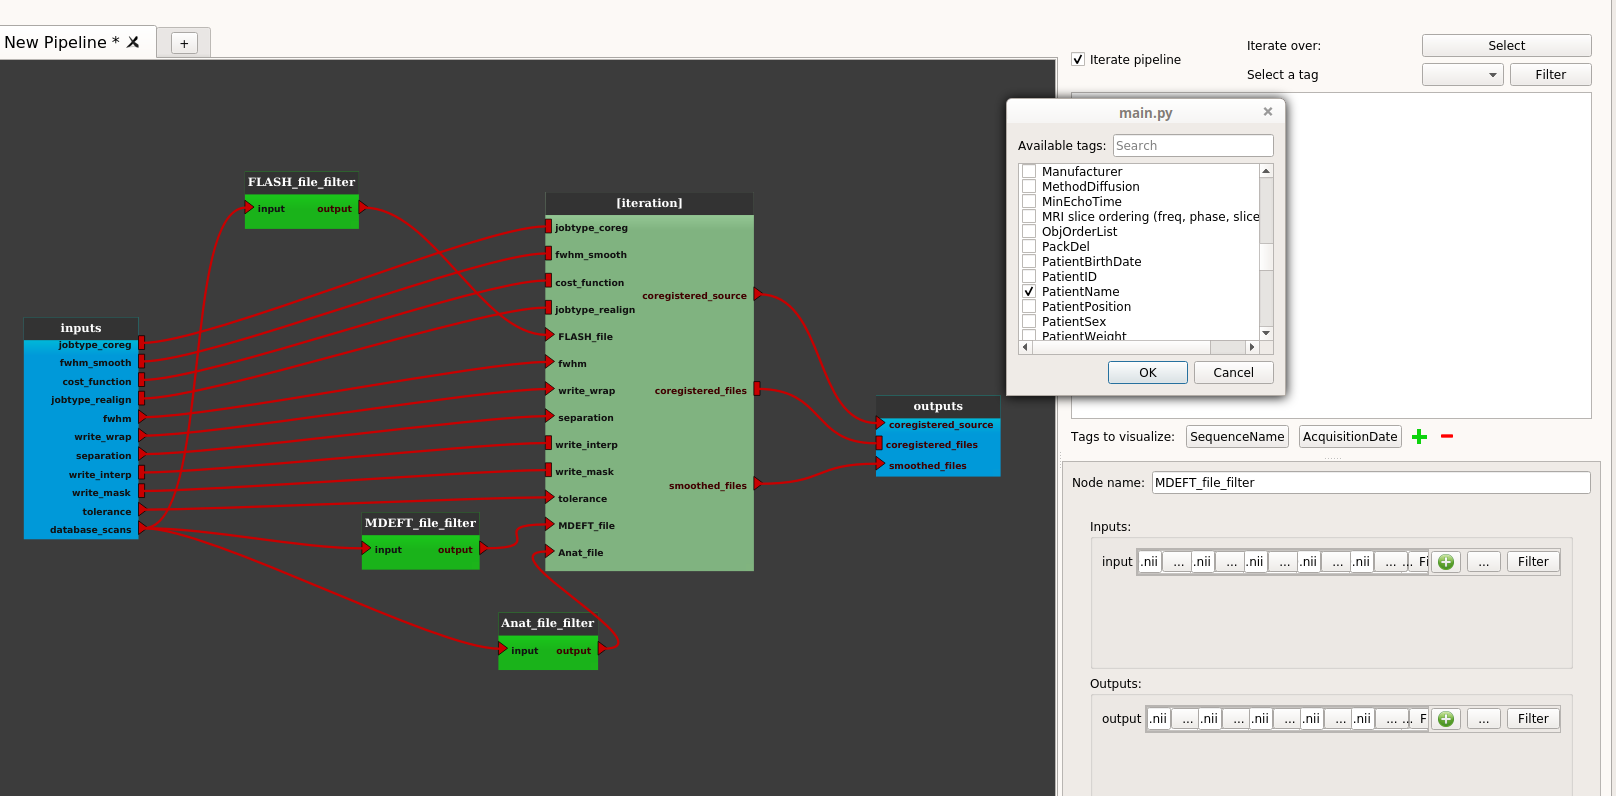
- Set up the iteration table:
Click on the “Select” button to select the tag to iterate (“PatientName”):
Click on the OK button, the “Select” button changes its name to the name of the selected tag (“PatientName”).
Click on the “Filter” button to select on which values of the tag the pipeline will be iterated (reminder: patients K49 and K51 got missing files):
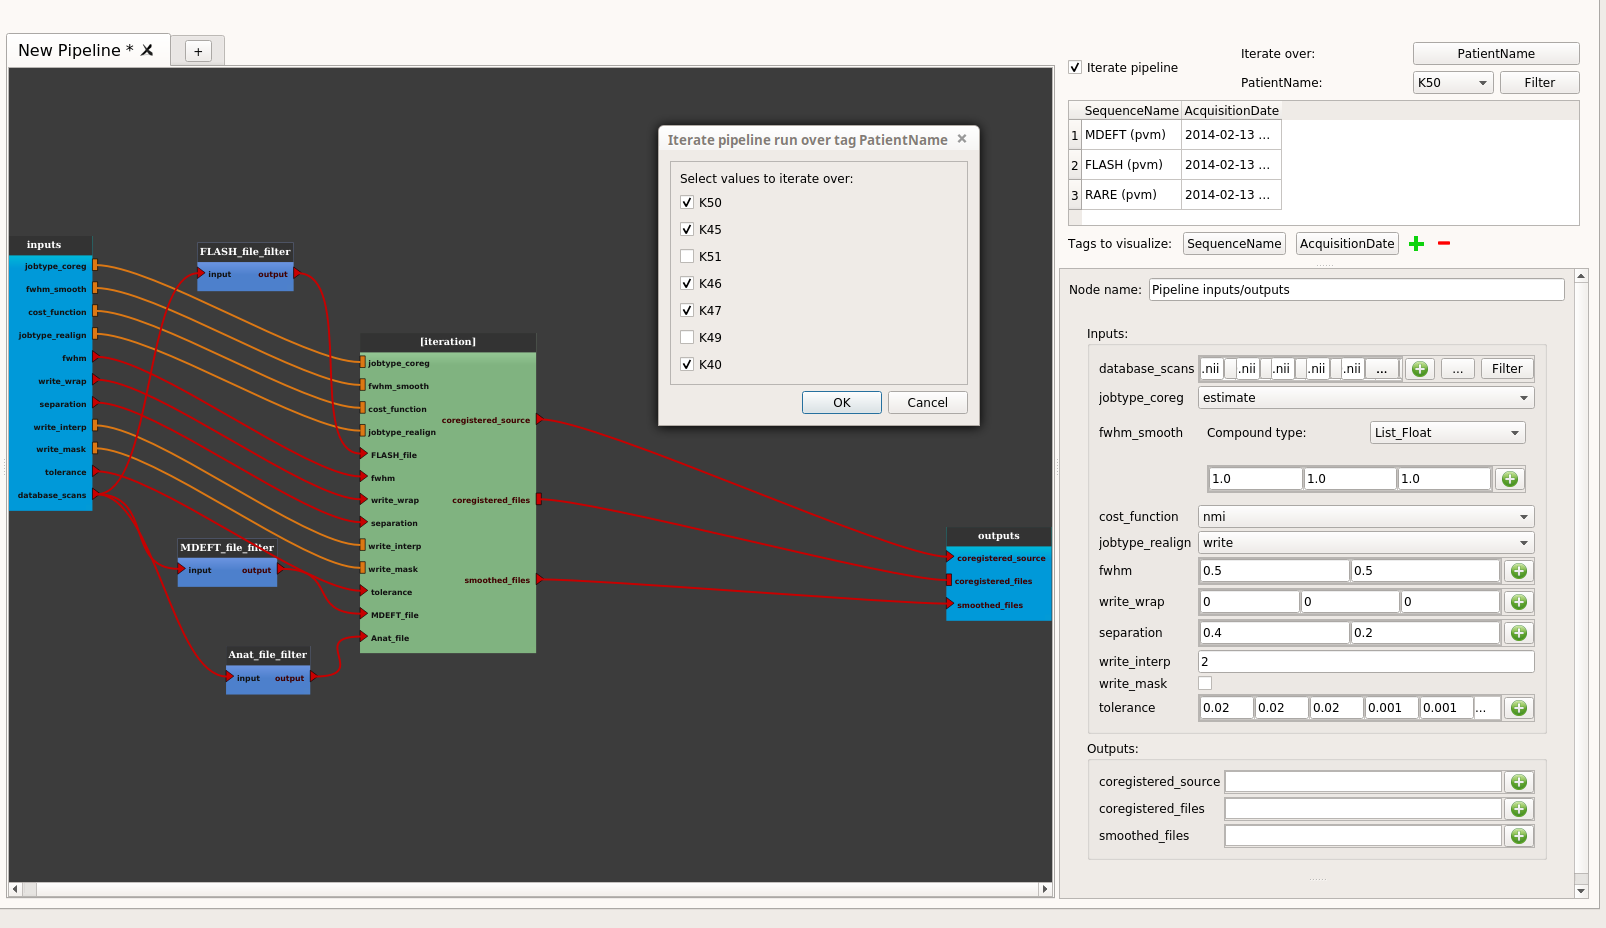
Click on the OK button.
Click on “Initialize pipeline”. The Run button becomes enabled.
Click on “Run pipeline”.