Viewer - Export to Nifti - Set default IRM locations - Set options - Use of ImageJ
Viewer
This section explains how to use MRI File Manager
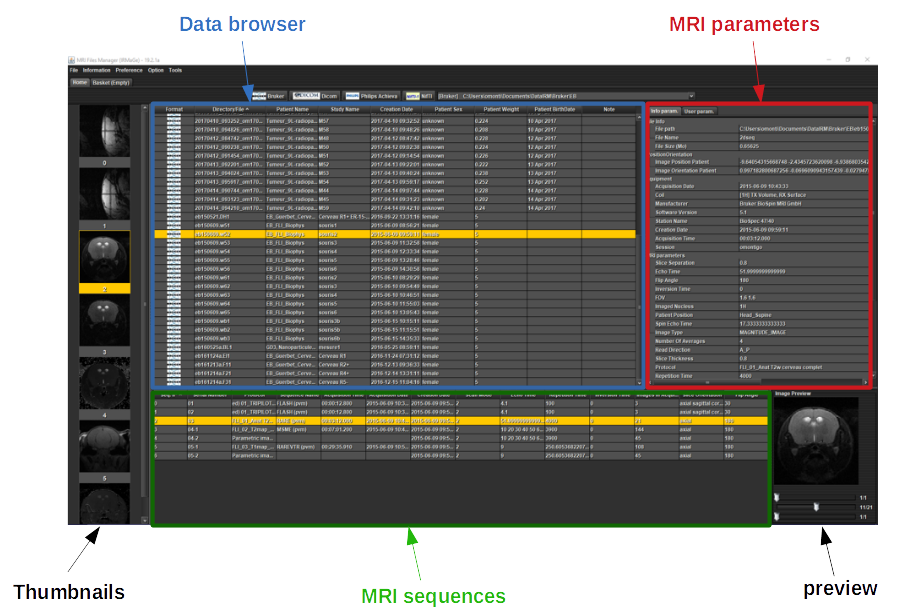
-
Click on one of the buttons 'Bruker', 'Dicom', 'Philips', 'Nifti' or 'Bids' to choose the data folder
(preview)
-
A dialog box opens and you have to choose the root directory containing the data IRM.
(preview)
-
A list of data appears in 'data browser' table.
If the software doesn't found the data, try to select directory before or after the one you chose.
-
Select a data in 'data browser' table (only one mouse click), a list of MRI sequences appears in the table below and image thumbnails are shown on the left.
-
For each selected sequence, MRI parameters and image preview are displayed.
-
If you double-click on a sequence, the image opens with the ImageJ interface (you can open several images at once).
Export to Nifti
This section explains how to convert data to Nifti-1 (file by file or all data).
-
Go to the 'File -> export -> Option export' menu.
-
A window 'Options export' appears
-
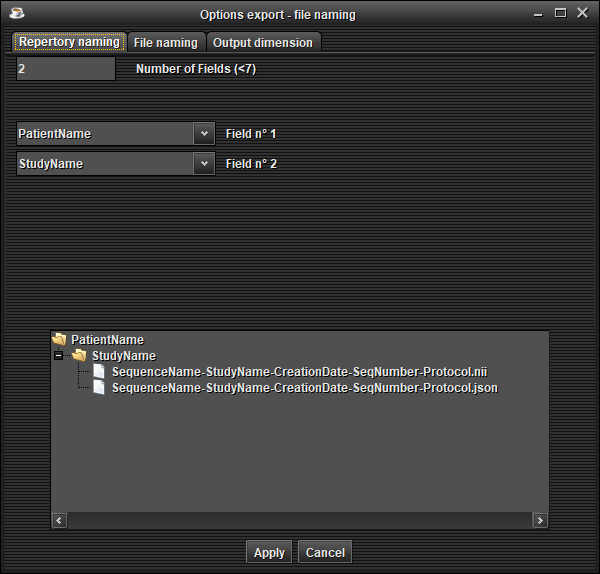
In the 'Repertory naming' tab, choose the naming of repertories
 (preview)
 -
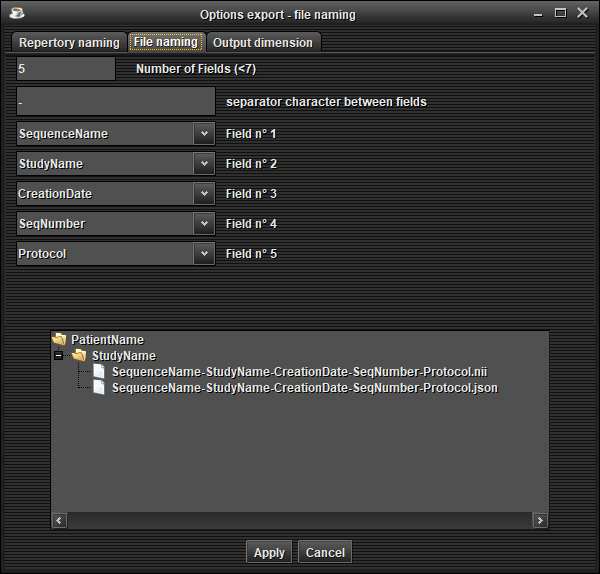
In the 'File naming' tab, choose the naming of files
 (preview)
 -
Click on 'Apply' button.
Your configuration is saved for the next use of the software.
2) Then, you must load the basket. There are several possibilities :
-
File by file without anonymization :
Select one or several sequences in the table at the bottom (Ctrl + mouse left click), open a pop-up menu by clicking the right mouse button and choose 'Add to basket'
 (preview)
 -
File by file with anonymization :
Select one or several sequences in the table at the bottom (Ctrl + mouse left click), open a pop-up menu by clicking the right mouse button and choose 'Anonymize and add to basket'
 (preview)
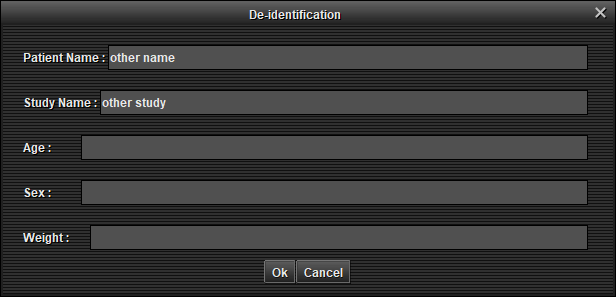
An anonymization window appears, modify the fields and 'Ok'
 (preview)
 -
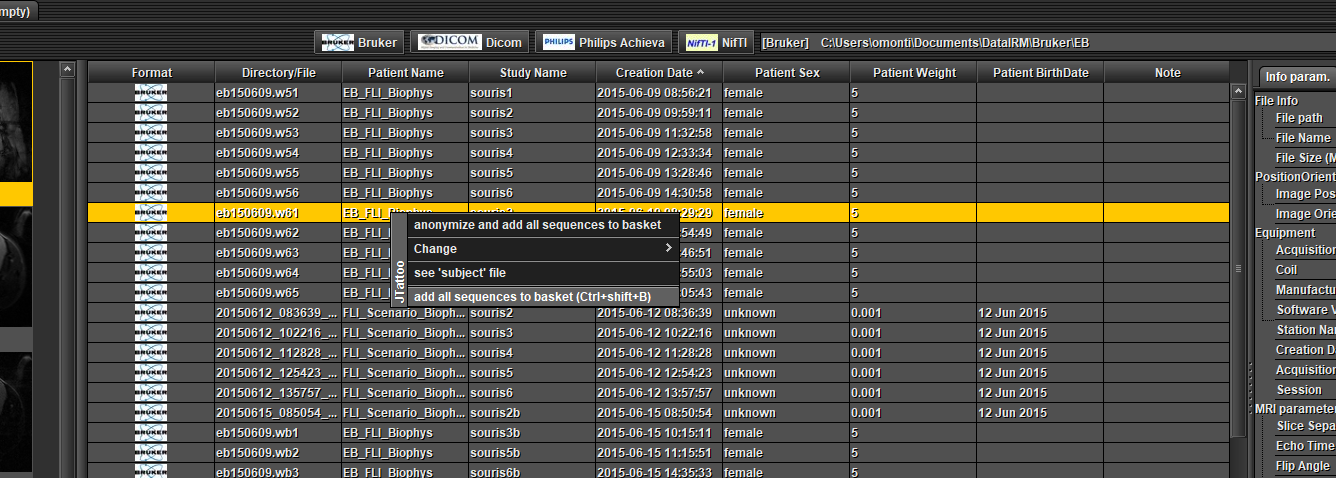
Full data without anonymization :
Select one or several data in the table at the top (Ctrl + mouse left click), open a pop-up menu by clicking the right mouse button and choose 'add all sequences to basket'
 (preview)
 -
Full data with anonymization :
Select one or several data in the table at the top (Ctrl + mouse left click), open a pop-up menu by clicking the right mouse button and choose 'anonymize and add all sequences to basket'
 (preview)
An anonymization window appears, modify the fields and click 'Ok'
 (preview)
3) Go to the basket tab :
-
if the 'Exportation Folder' field is empty, click on 'Change' to choose the folder where you want to export your data.
-
Click on 'Export to Nifti-1'
-
At the end of the export, a dialog box informs you if the export is a success or a failure.
Set default IRM locations
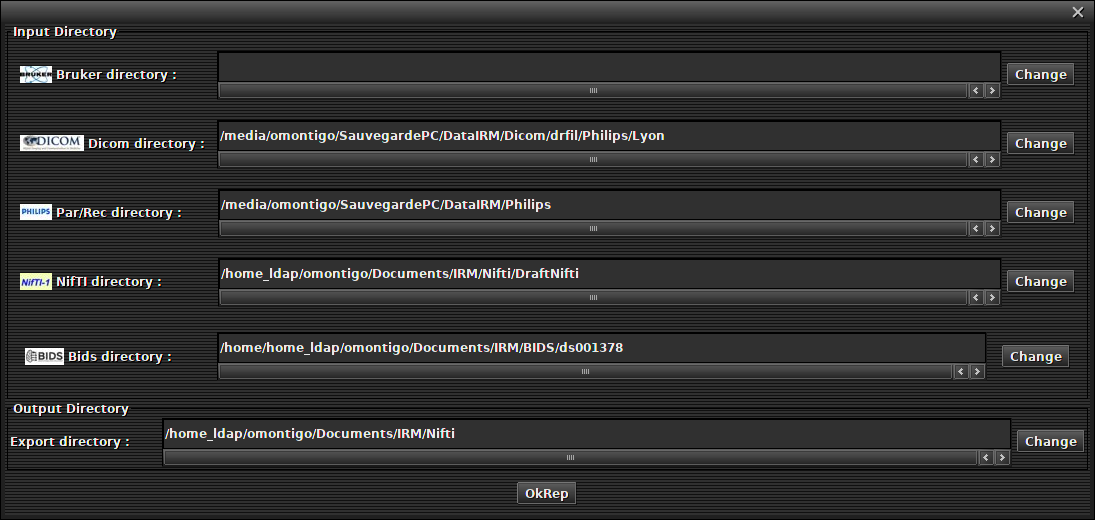
This section explains how to define the default data folder for each format.
-
Go to the 'Option -> Current working directory' menu
-
A dialog box appears
 (preview)
 -
For each format, choose the data folder by default.
-
Click on 'Ok rep' button.
Your configuration is saved for the next use of the software.
Set options
There are other export options :
-
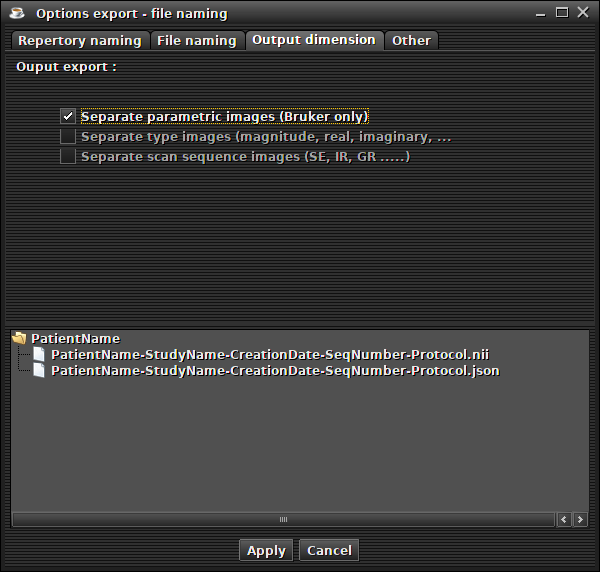
file separation for parametric images from Bruker ('File -> export -> Option export' menu and 'out dimension' tab)
 (preview)
This option (for Bruker only) allows to export the parametric images to Nifti separately (example : signal intensity, T2 relaxation time, std dev of the fit, ....)
-
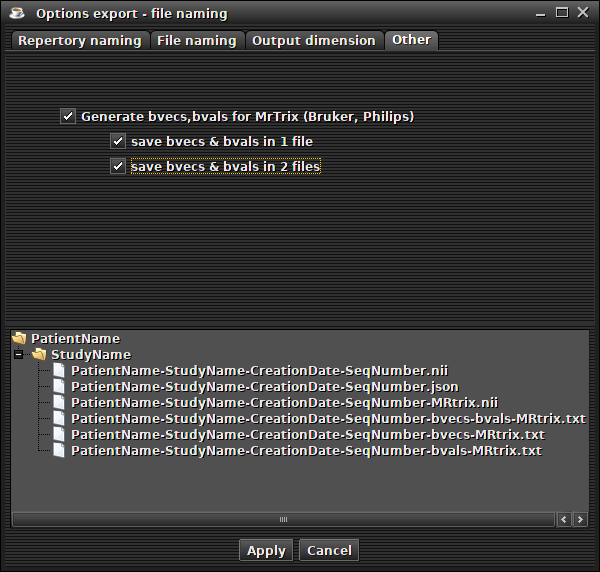
creation of bvecs/bvals files for MrTrix ('File -> export -> Option export' menu and 'other' tab).
 (preview)
You can generate bvecs/bvals files for reading diffusion sequences with MrTrix and FSL (Bruker and Philips only).
Your configuration is saved for the next use of the software
In this case, several files will be created (if the sequence contains the diffusion values) :
- a bvecs/bvals text file with a '-bvecs-bvals-MRtrix' suffix and a '.txt' extension (if this option is checked)
- a bvecs text file and a text bvals file created separately (if this option is checked)
- an additional Nifti file with a '-MRtrix' suffix and his transformation matrix reset to zero
Use of ImageJ
This section explains how to use ImageJ tools and his plugins.